|
|
||||||||||||||||||||||||||||||||||||||||||||||||||||||||||||
|
|
||||||||||||||||||||||||||||||||||||||||||||||||||||||||||||
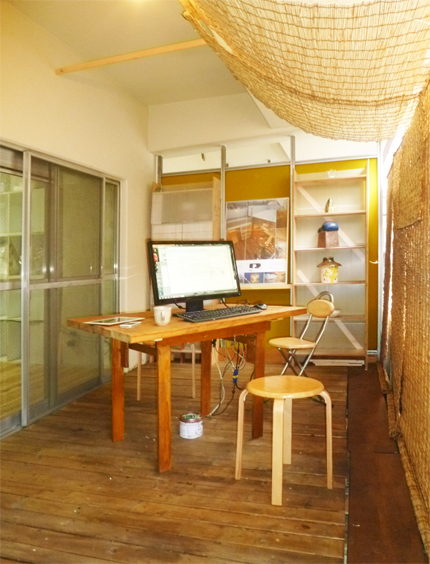 Working Outside on Cool Days 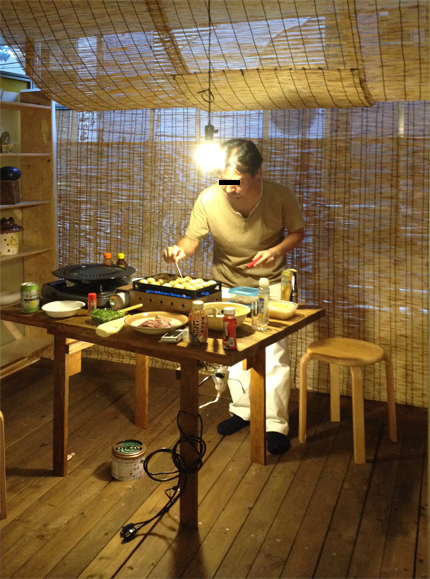 thanks to the wooden deck, I've also taken up hobbies like having takoyaki parties and other veranda parties. I built a 6-tatami mat size wooden deck on my balcony I often recommend outdoor wooden decks in my residential designs, so I decided to build one myself on the balcony of my office. Since the balcony is not exposed to much rain, I used a much lower grade of wood decking material than usual, but I was still satisfied with the result. The cost was also considerably lower. When the weather is nice, I sometimes work here. BEFORE 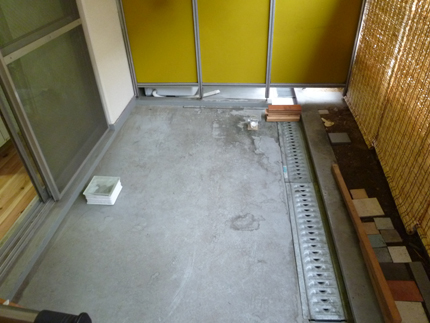 My workplace is a room in an apartment building, and the balcony is 2.2m deep. 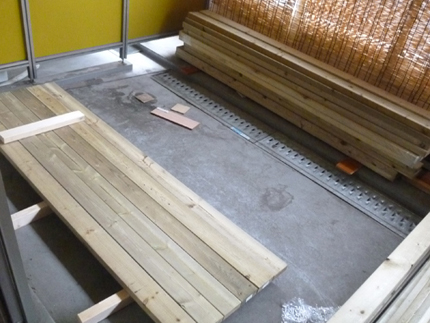 I had always wanted to put a wooden deck there. Apartments sometimes have to clear out everything on the balcony during major renovations, so I decided to divide the wooden deck into six sections like a slatted platform so that it would be easy to remove. 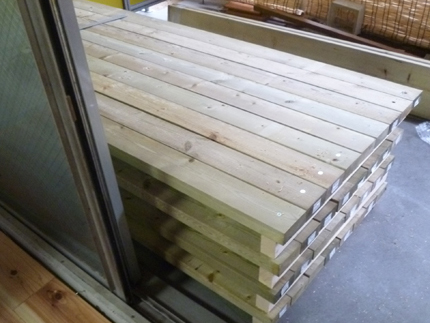 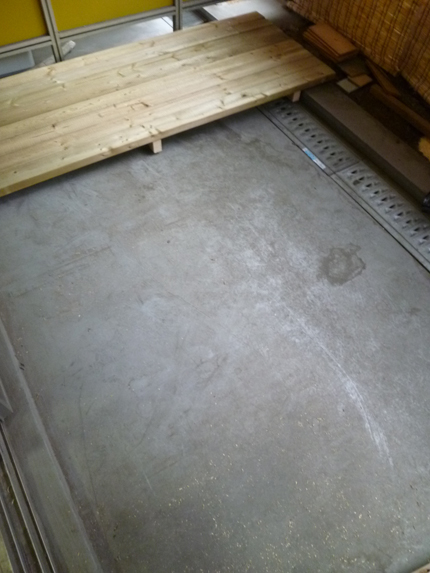 I installed the slatted wooden deck section by section from one end. The concrete floor level varies in different places, so adjusting the level was quite difficult. The photo after this was the first one, which was finished in an oak-like color. The unevenness of the paint gives it character. If you're reading this, I encourage you to try DIY wooden decking yourself. The area is about 6 tatami mats . The cost of the treated lumber, including shipping, is 28,000 yen. Screws cost 1,100 yen, and paint brushes cost 1,500 yen. |
|
||||||||||||||||||||||||||||||||||||||||||||||||||||||||||||
|
|
||||||||||||||||||||||||||||||||||||||||||||||||||||||||||||
| Google Yahoo |
|||||||||||||||||||||||||||||||||||||||||||||||||||||||||||||
